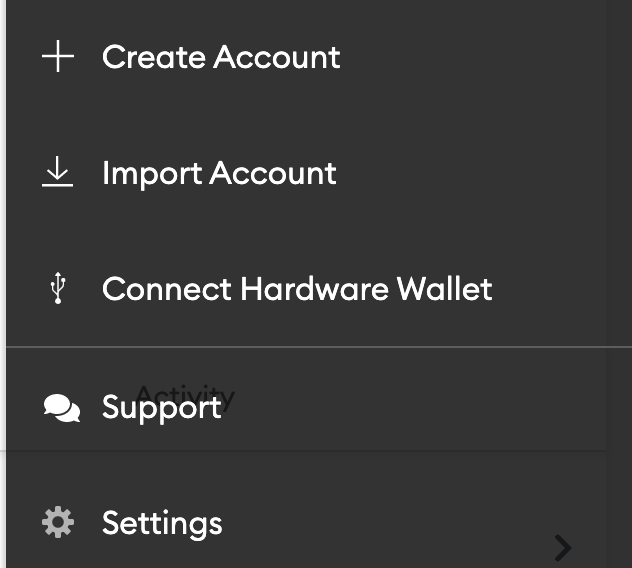
How to Use DeFi & NFTs with Your Ledger
⬆️ Level up your crypto experience with the full Guide:
- How to set up your Ledger
- How to back up and store your Ledger
- How to add and swap assets with your Ledger
- How to stake ETH with your Ledger
- How to use DeFi & NFTs with your Ledger (👈 you are here)
- Troubleshooting & FAQ
How to Use DeFi with Your Ledger
Decentralized Finance (DeFi) can be a scary place if you look under the bed at night.
With hackers lurking around corners and scammers creeping around in the dark, you might be kept up late wondering if your funds are safe. Ledger, the premiere hardware wallet on the market today, is the cold storage wallet solution you need to access DeFi in a safe, reliable way.
We’ve covered a bit on how to stake with your Ledger, but In this part of the Ultimate Ledger Guide, we will delve deeper on how to use DeFi with your Ledger.
Ledger offers two ways to access decentralized apps (dApps) with a DeFi focus. These include:
- Using the Zerion app, which is accessible directly through the Ledger Live app.
- Connecting your Ledger to hot wallets such as MetaMask, Terra Station, MyCrypto, MyEtherWallet, and more.
- The third way to access DeFi through Ledger is on the way. There are many dApps coming to Ledger Live, such as Compound, and Aave.
Let’s dive into each option so you can begin your journey into the world of ledger-supported decentralized finance.
Zerion: DeFi Right Inside your Ledger Live App
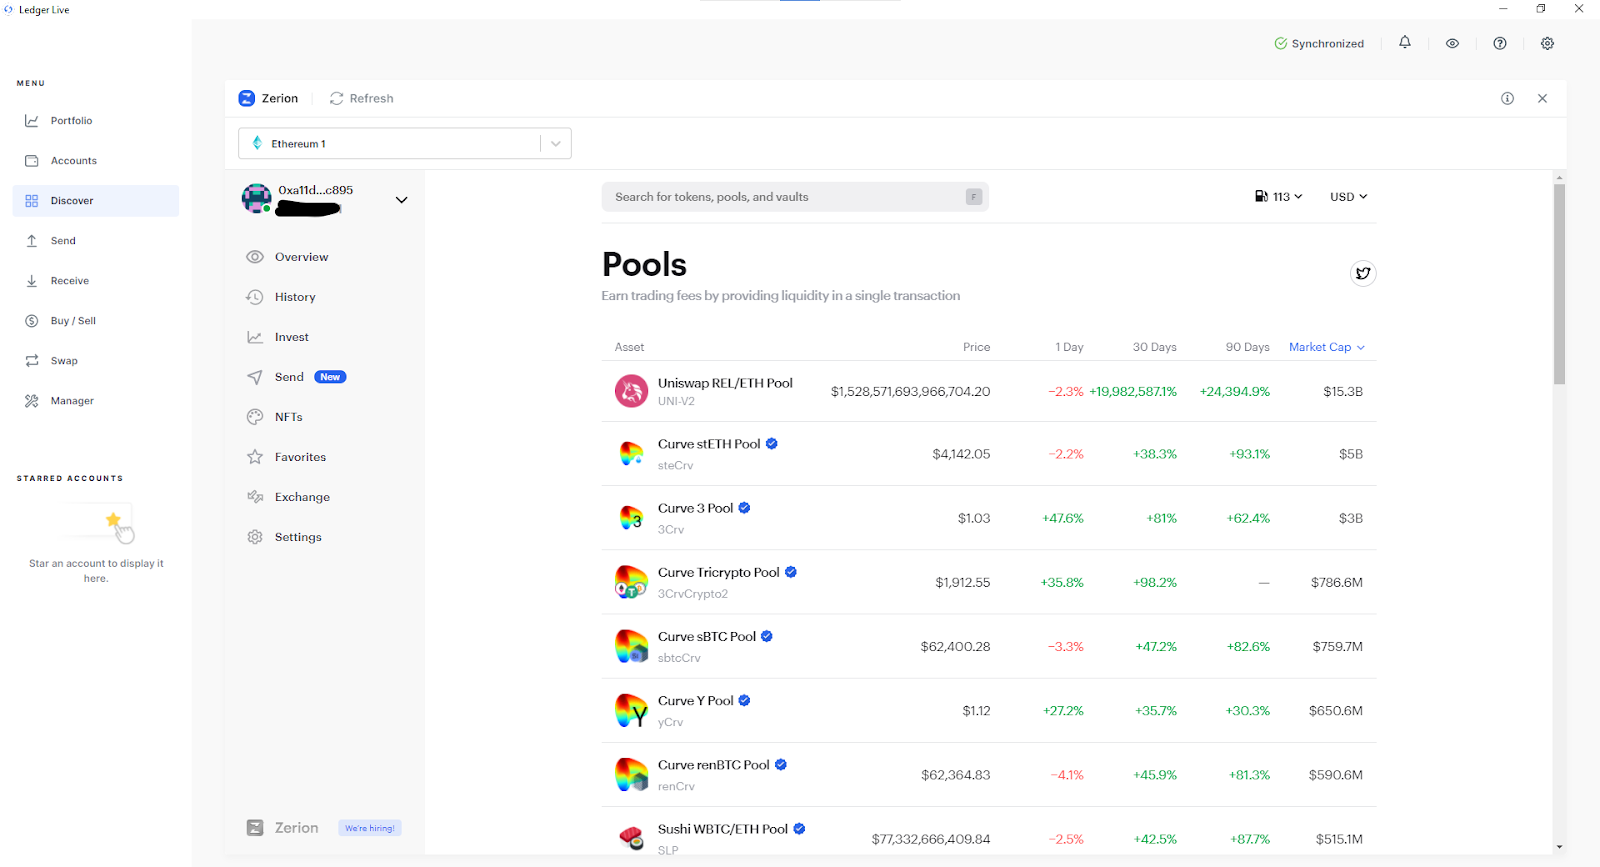
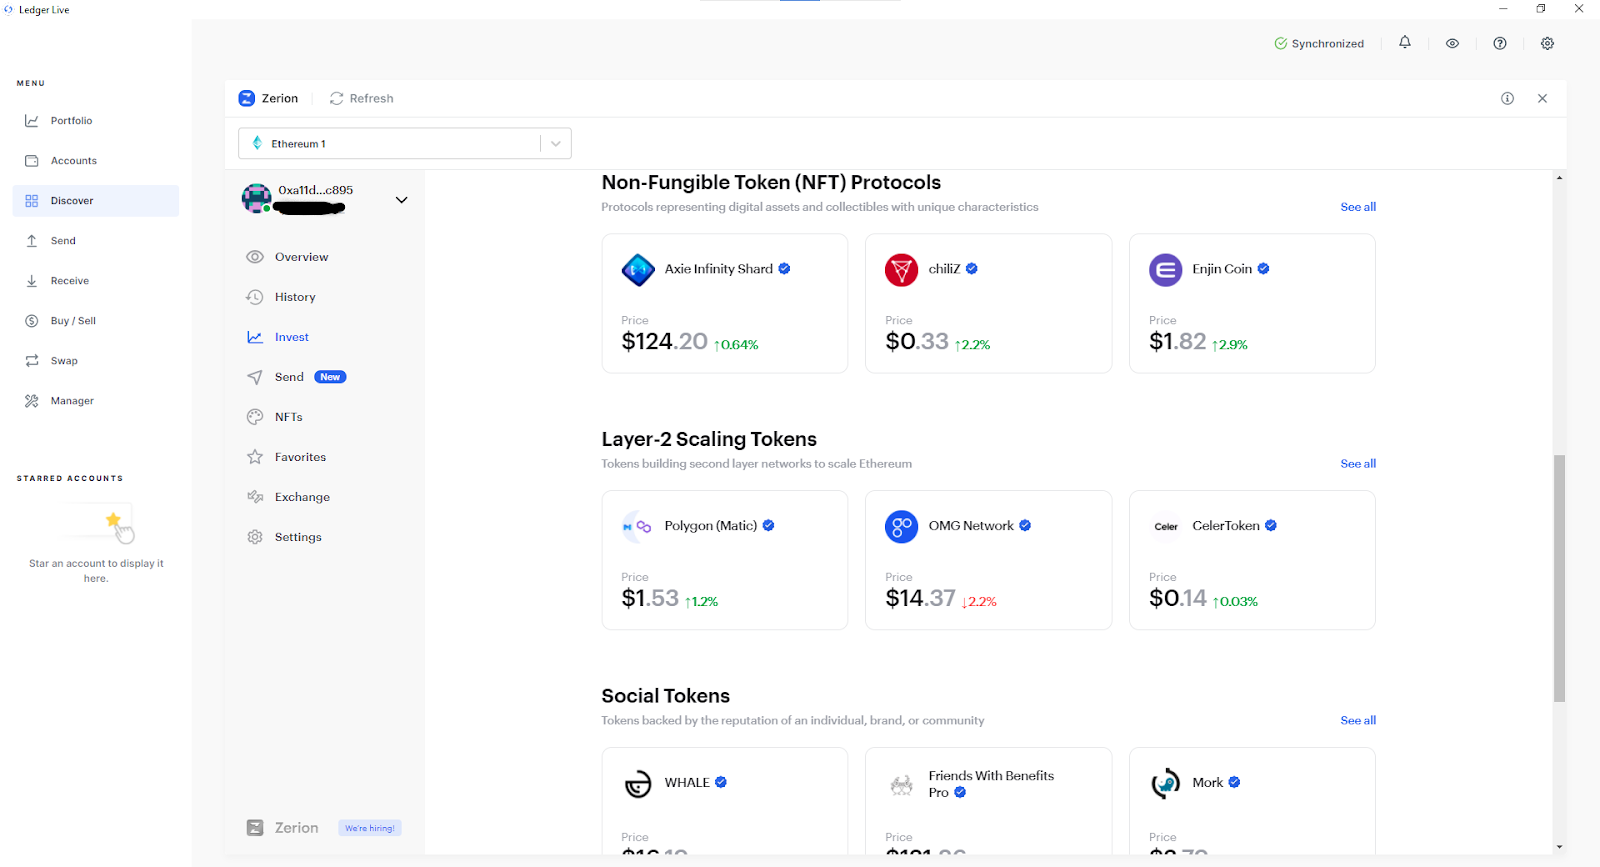
Zerion is the only DeFi-focused app accessible directly in Ledger Live as of November 2021. Zerion offers a variety of yield farming and liquidity pool options. Users can swap tokens, invest in indexes, and provide liquidity for token pairs by entering pools like the Curve stETH pool, the Curve sBTC pool, and the Sushi wBTC/ETH pool.
Now, let’s get in on all this DeFi goodness, shall we?
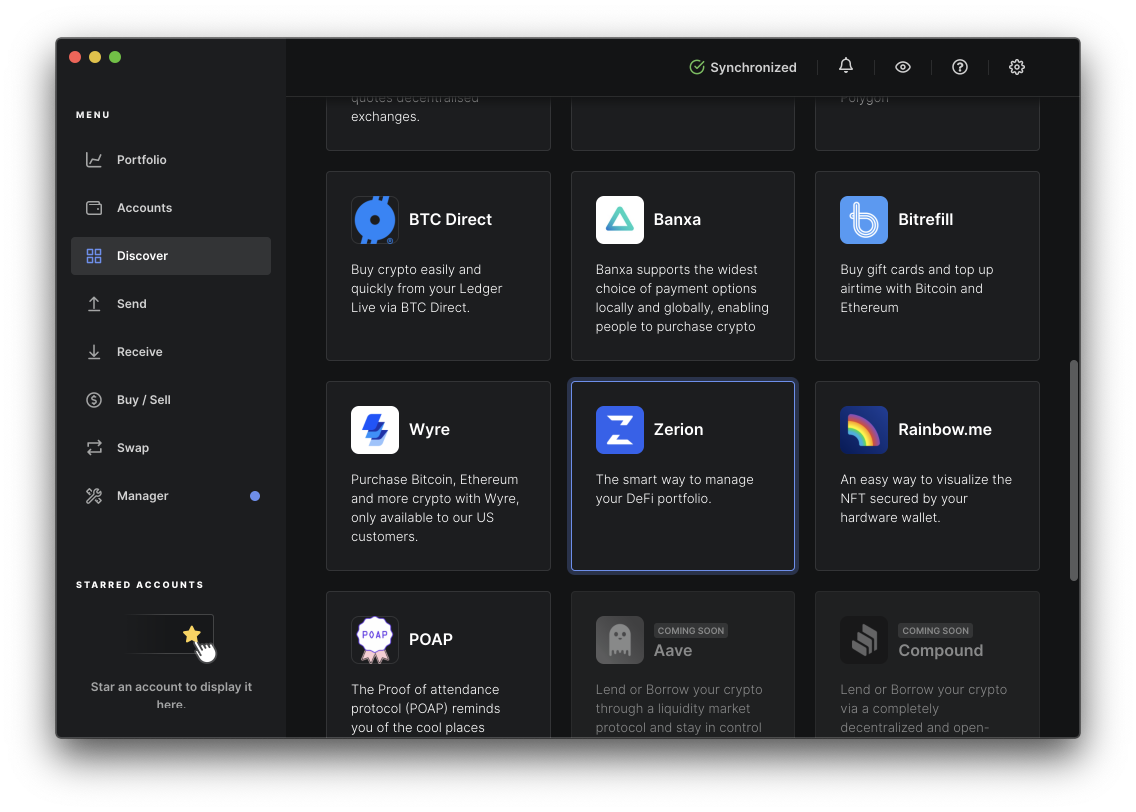
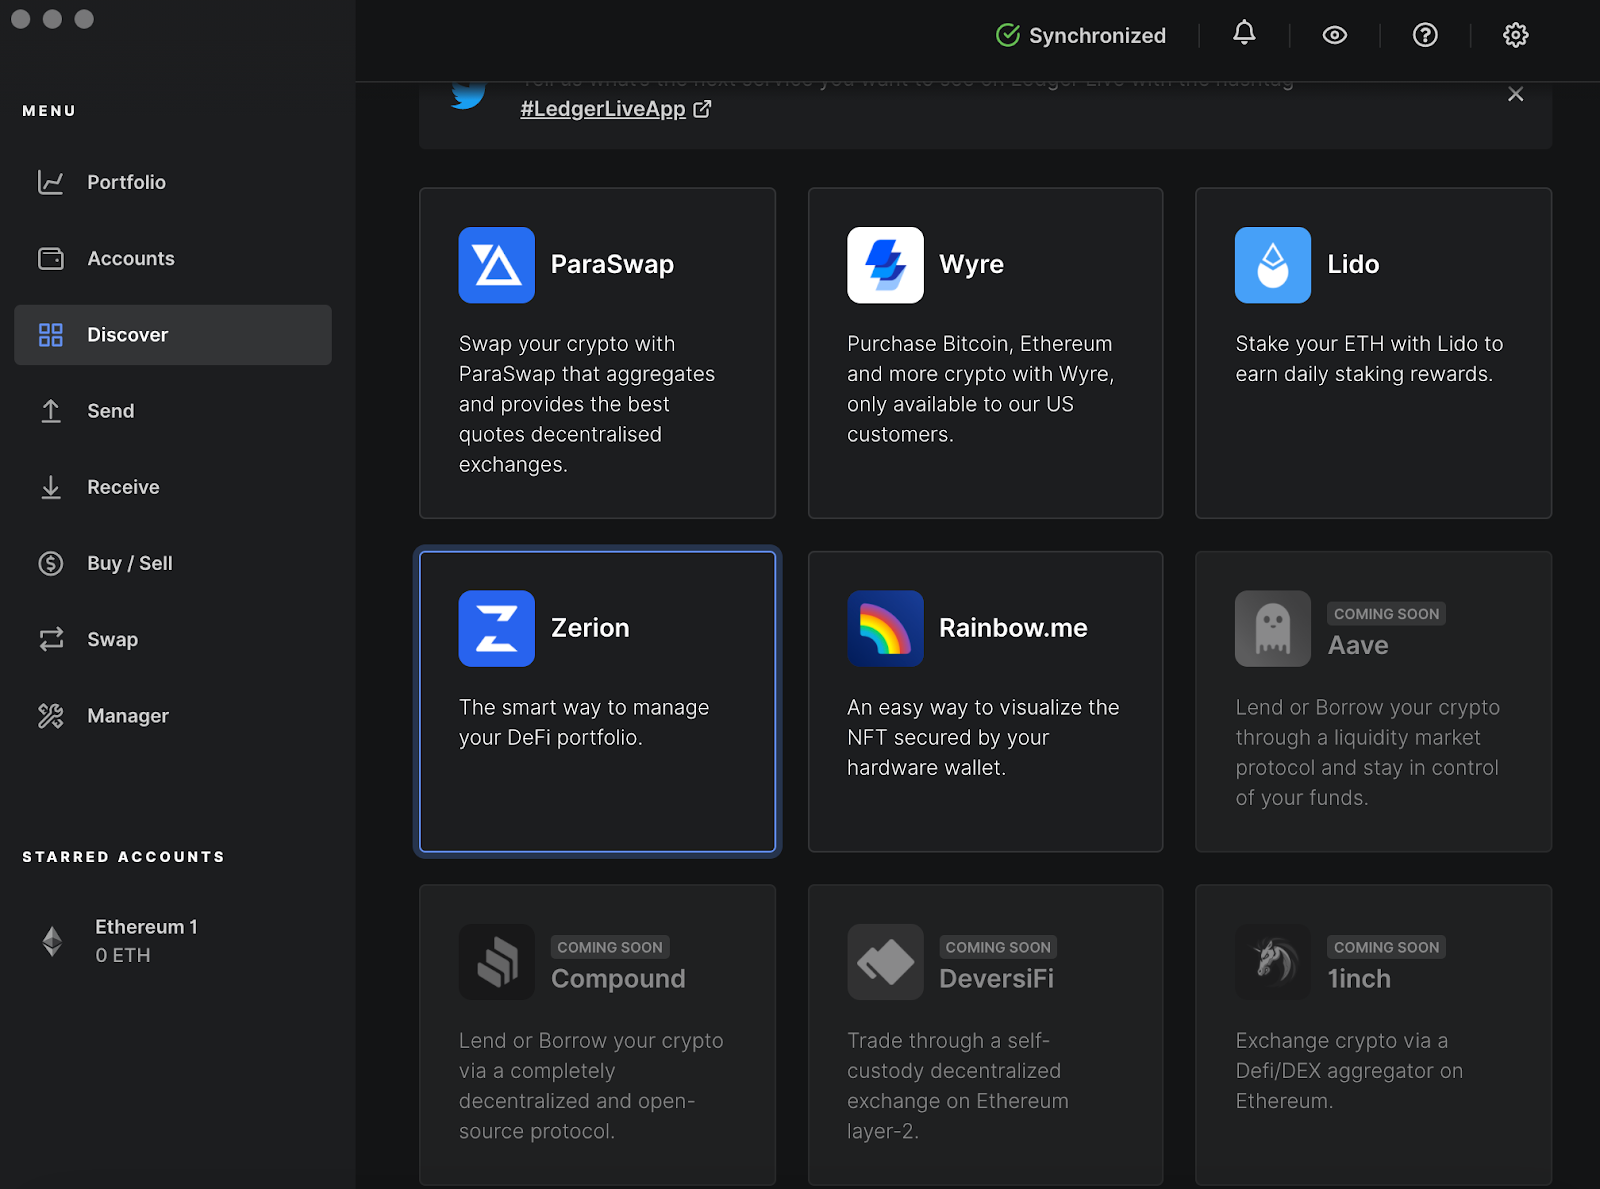
How to Navigate to Zerion from the Ledger Live dashboard
- Plug your Ledger device into your computer using the cord it came with and open Ledger Live.
- Click “Discover'' on the menu on the left.
- Next, Click on the Zerion app.
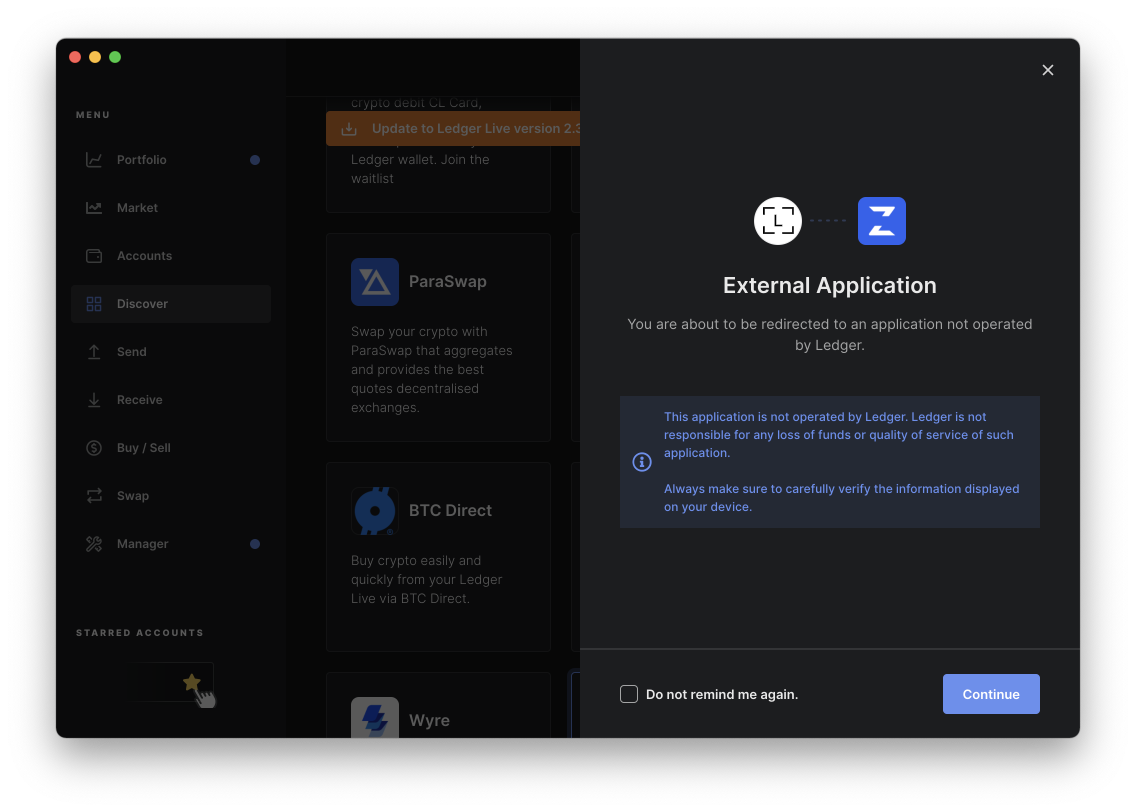
You will have to agree to a redirect notice. Then, you will be directed to Zerion.

Now, you’re in! Let’s learn how to use it.
How to Use Zerion with Ledger
Zerion has a variety of DeFi options for users of just about any skill level and risk tolerance. The simplistic design of the app makes it a breeze to learn in under an hour.
Zerion also sorts out tokens into “blue chip,” which is shorthand for relatively reliable investments vetted and used by the pros. If you provide liquidity for a pool of blue chip tokens, you’d have high confidence that none of those tokens would fall to zero. This distinction is great for people who are new to DeFi or not very risk-tolerant in general.
Other categories in Zerion are NFT protocols, social tokens, and more—scrolling through the Zerion categories is an education session all in itself, since it can be incredibly difficult to keep up with all the new investment opportunities being built daily. These categories are a user-friendly, easy way to onboard crypto-newbies, or just to save time when looking for tokens!
Zerion takes very little time to learn and is a great first step after you set up your Ledger. It’s pretty incredible that you can make trades and move tokens without constant wallet-hopping and protocol-jumping like many DeFi power users have grown accustomed to. DeFi all in one place sounds too good to be true, but Zerion really can be a one-stop-shop.
Connect your Hot Wallet to Unlock the Wide World of DeFi
Zerion doesn’t give you access to every token pool or investment opportunity in Web3. To unlock the rest of the DeFi world, simply connect your Ledger to your hot wallet. This can be done in a few easy steps.
To explain, I’ll use MetaMask, the most popular non-custodial wallet in the world, as my example. If you haven’t set up a MetaMask wallet, check out BanklessDAO’s instructive how-to article on just that endeavor. Got one already? Good, we’ll keep it moving. In the How to Stake with Your Ledger article, we already covered connecting to MetaMask, but let’s review it again here in case you’ve jumped to this article specifically, you DeFi Degen! In this example let’s say you have ETH in your MetaMask wallet that you want to secure with a cold storage wallet.
Here’s how to connect it:
- Plug your Ledger into your computer using the cord it came with. *Note: if your Ledger came in a box that was tampered with, or your seed phrase was already filled out with words, do not use that device. Contact the Ledger team immediately.
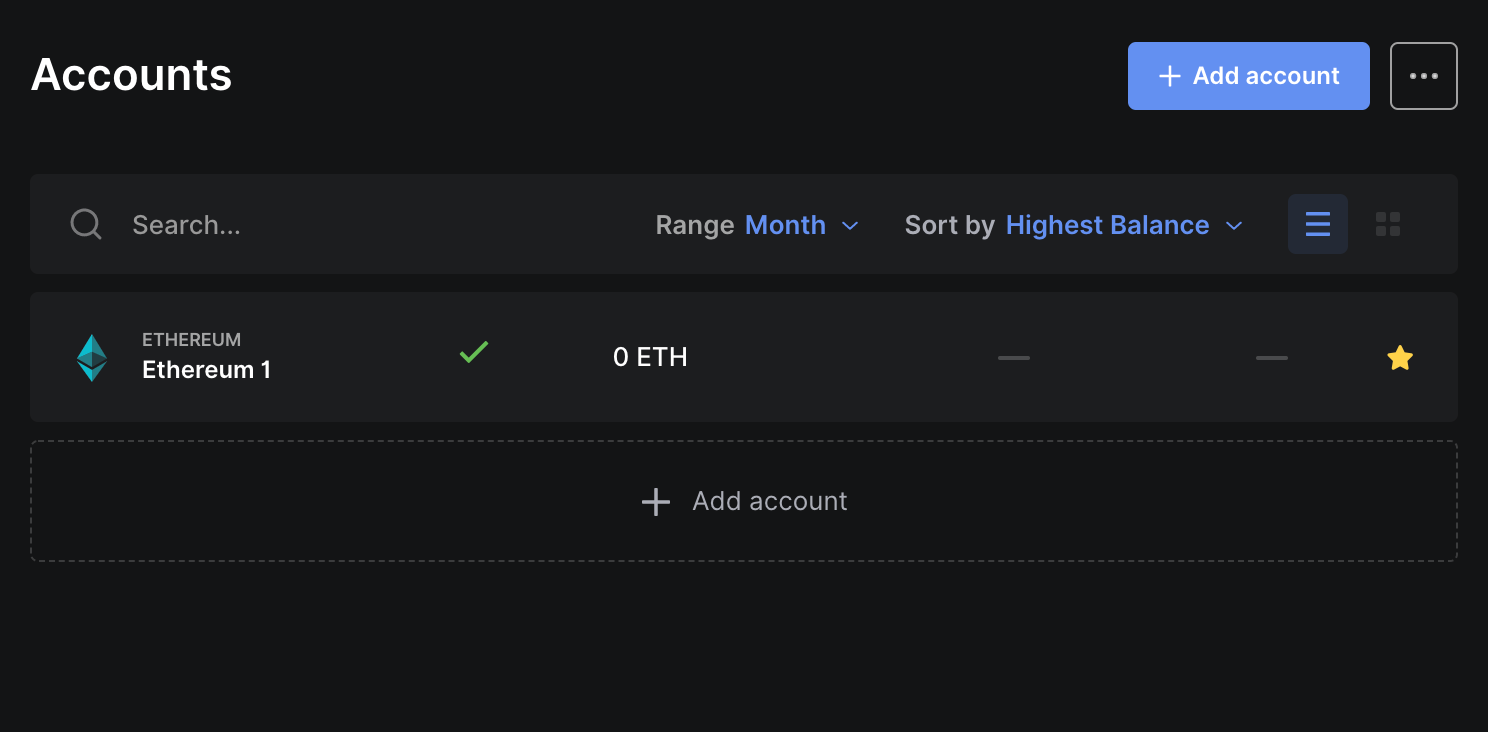
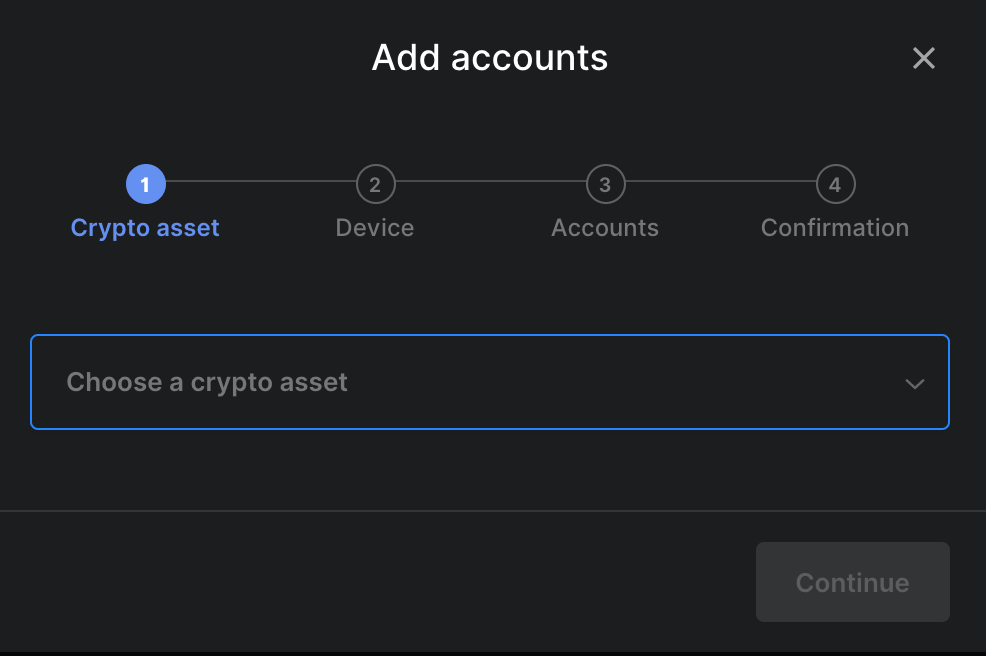
- Open the Ethereum app on your Ledger device. If you don’t have the Ethereum app installed on your device yet, go to Ledger Live desktop app, then “Accounts.” Click “add account” and choose the crypto asset you want to use.
- Close the Ledger Live app on your computer. For the hot-cold wallet connection to be successful, no other devices can be accessing Ledger.
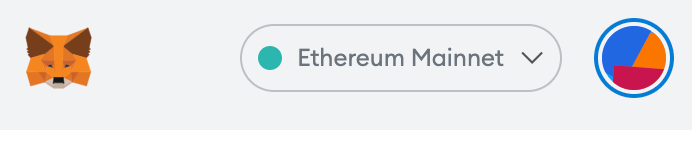
- Open your MetaMask extension on your browser. Ensure the chain you’re interacting with on MetaMask is the same one your Ledger has open. In this case, we have Ethereum on both.
- Click the colorful circle in the top right corner.
- Now, click “Connect Hardware Wallet.”
- Next, you’ll choose your hardware wallet. Make sure your device is connected, turned on, and displaying the same chain MetaMask is.
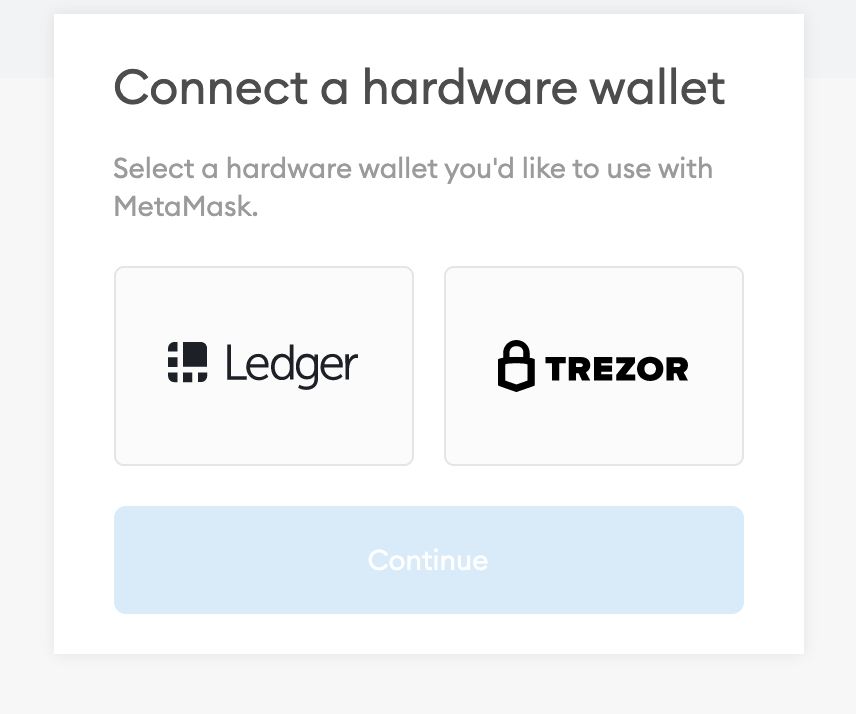
Select “Ledger.” MetaMask will search for your Ledger and connect once it finds it. Make sure your Ledger isn’t accessing anything else — your Ledger Live app and any other hot wallets your Ledger is connected to should be closed.
Once the connection is complete, you’ll have to set up a private key and seed phrase for your Ledger account within MetaMask. This is a separate account from the MetaMask one you already have — you have to transfer funds to it, it does not automatically connect to your current MetaMask account. Name the account something that helps you remember what it is, such as “hardware wallet,” “ledger bridge” or “cold storage.”
Troubleshooting: if MetaMask isn’t connecting to Ledger, try:
Closing anything that could be accessing your Ledger, such as Ledger Live or another wallet.
Using another browser, like Firefox.
Updating your Ledger.
Updating your browser.
Now, whenever you’re running transactions through your MetaMask wallet, use the account tied to your Ledger rather than the MetaMask account you previously had. This ledger-on-MetaMask account serves as an extra layer of security for your funds, because hackers cannot access the private key on your cold storage wallet. Think of it as setting up two factor authentication for your funds. Two-factor does not make you invincible to all scams, it just takes signing capabilities offline and into cold storage.
Mobile and Desktop Availability
Users can now access dApps on their phones through WalletConnect. A simple scan of a QR code allows you to interact with protocols on your phone, rather than just your computer.
To learn more about how to use WalletConnect to access DeFi from your smartphone, read this article.
More DeFi Apps on The Way
Ledger is only getting better. With Compound, and Aave integrations on the way, accessing DeFi protocols will continue to get easier with each new update.
By navigating to the “Discover” section of Ledger Live, you can quickly see which apps are slated to arrive soon.
These apps will be just as easy to access as Zerion. We can’t wait to see what comes to Ledger next!
How to Use Your Ledger with NFTs
NFT stands for Non-Fungible Token - representing a class of tokens that are blockchain based and can be used to represent almost everything - including physical assets. Currently, a large majority of NFTs are based on the Ethereum blockchain, even though other blockchains like Solana support NFT standards. At the core of NFTs is the property of “non-fungibility”. This simply represents uniqueness and in other words: irreproducibility. This irreproducibility is ensured by a system of smart contracts that identify the individual scarcity of each token.
“An NFT by any other name, sorry Shakespeare, would not smell as sweet.”
NFTs exist in various formats, from music files, to GIFs, to tweets and even collectible trading cards. NFTs also work effectively as community management assets - One major example here is the Bored Apes Yacht Club (BAYC), which gives unique real-world advantages to members of the community; a CRM tag of sorts.
Regardless of its incarnation, each NFT possesses a unique set of characteristics that directly influence the market desirability of that NFT.
Using Ledger with OpenSea
OpenSea is a popular NFT marketplace and as such, will be featured here for the majority of our readers. BanklessHQ did an excellent podcast with its CEO, Devin Finzer, which you can listen to here.
⚠️ Please note that this guide covers Ethereum based NFTs only!
How to manage your NFT collection with OpenSea
As a Ledger owner, you can connect your device to OpenSea by either using Metamask or WalletConnect.
Make sure the latest version of the Ethereum app is installed on your Ledger.
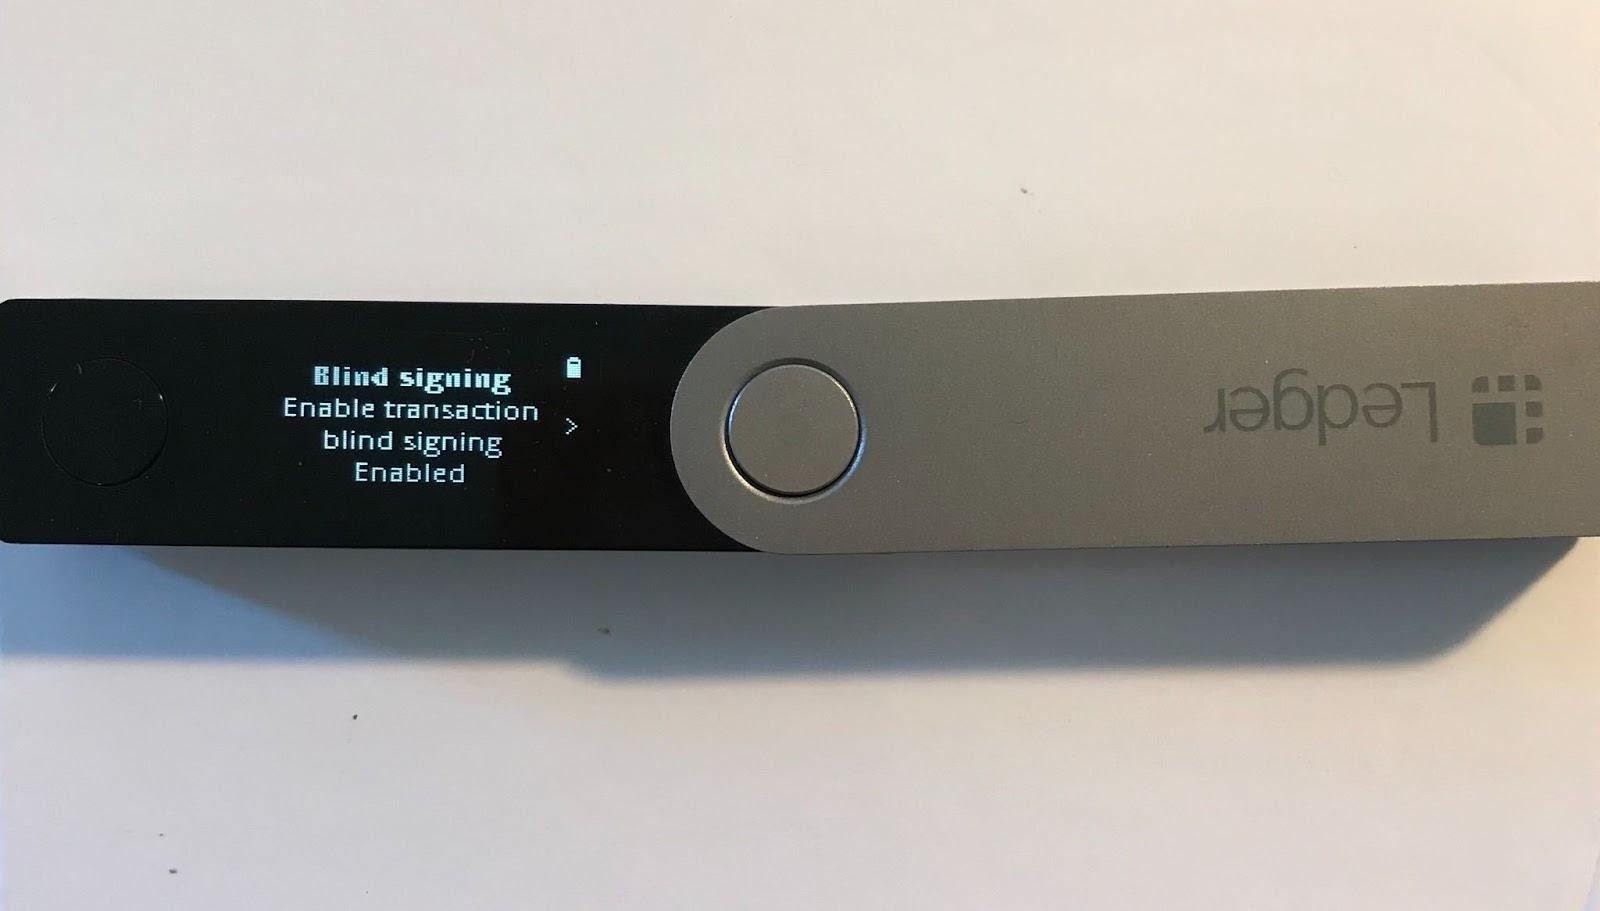
Enable blind signing in the Ethereum app on your ledger using the following steps:
Connect your ledger device and unlock it
Open the Ethereum application, press the right button to navigate to settings and confirm by pressing both buttons.
In the “Bling Signing” section, press both buttons to confirm. The device display shows “Enabled” (the following screen) to confirm.
Connecting your Ledger device to OpenSea via Metamask
- Download and install the firefox browser.
- Connect your Ledger to Metamask in the section below, title “Setting up your Ledger Ethereum account through Metamask.”
- Visit OpenSea
- Open the metamask extension in your browser and unlock it with your password to also open your Ledger Metamask account.
- On the OpenSea website, click on the wallet icon, select Metamask and connect. Select the multicoloured favicon and select Profile to show your Ledger NFT collection.
Setting up your Ledger Ethereum account through Metamask
- Download and install the Firefox browser on your computer.
- Download and install the Metamask extension in the browser by visiting https://metamask.io/, clicking download, scrolling down to Firefox and selecting “Add to Firefox” and following the prompts that follow. (Be mindful that the stated publishers of the app - “danfinlay, kumavis” are actually legitimate leads behind MetaMask).
- Open Metamask and create your first metamask account.
- When you’re set up, plug in your Ledger device and open the Ethereum app by navigating to the Ethereum icon on your device and pressing both buttons to select it.
- In Metamask, click the colorful favicon, select Connect Hardware Wallet, select Ledger and proceed with Continue. After a few seconds, a list of account addresses will appear. Select an Ethereum address, tick the box and click Unlock.
- Your Ledger Ethereum account and ETH balance will now appear in Metamask.
Connecting your Ledger device via WalletConnect
- Visit OpenSea.
- Select the ‘wallet’ icon and choose “Wallet Connect” - Copy the QR code that appears.
- In Ledger Live, visit the Accounts tab and select your Ethereum account.
- In your Ethereum account, select Manage and then WalletConnect. A WalletConnect window then appears in Ledger Live.
- Paste the QR code link into the field and click Continue. OpenSea Connected then appears in Ledger Live.
- On the OpenSea website, select the colourful favicon and click on Profile to display your Ledger NFT collection.
Now, you’ve connected to OpenSea via Metamask or WalletConnect. From here, you can purchase NFTs as usual. That topic is outside of the scope of this article, but you can find further details here.
Soon, NFTs will be accessible directly within Ledger Live as Rarible integrates with Ledger. This means you can buy, sell, and trade NFTs within Ledger Live as soon as Rarible is supported.
⚠️ Important: Keep Ledger Live open to ensure that your Ledger device remains connected to OpenSea.
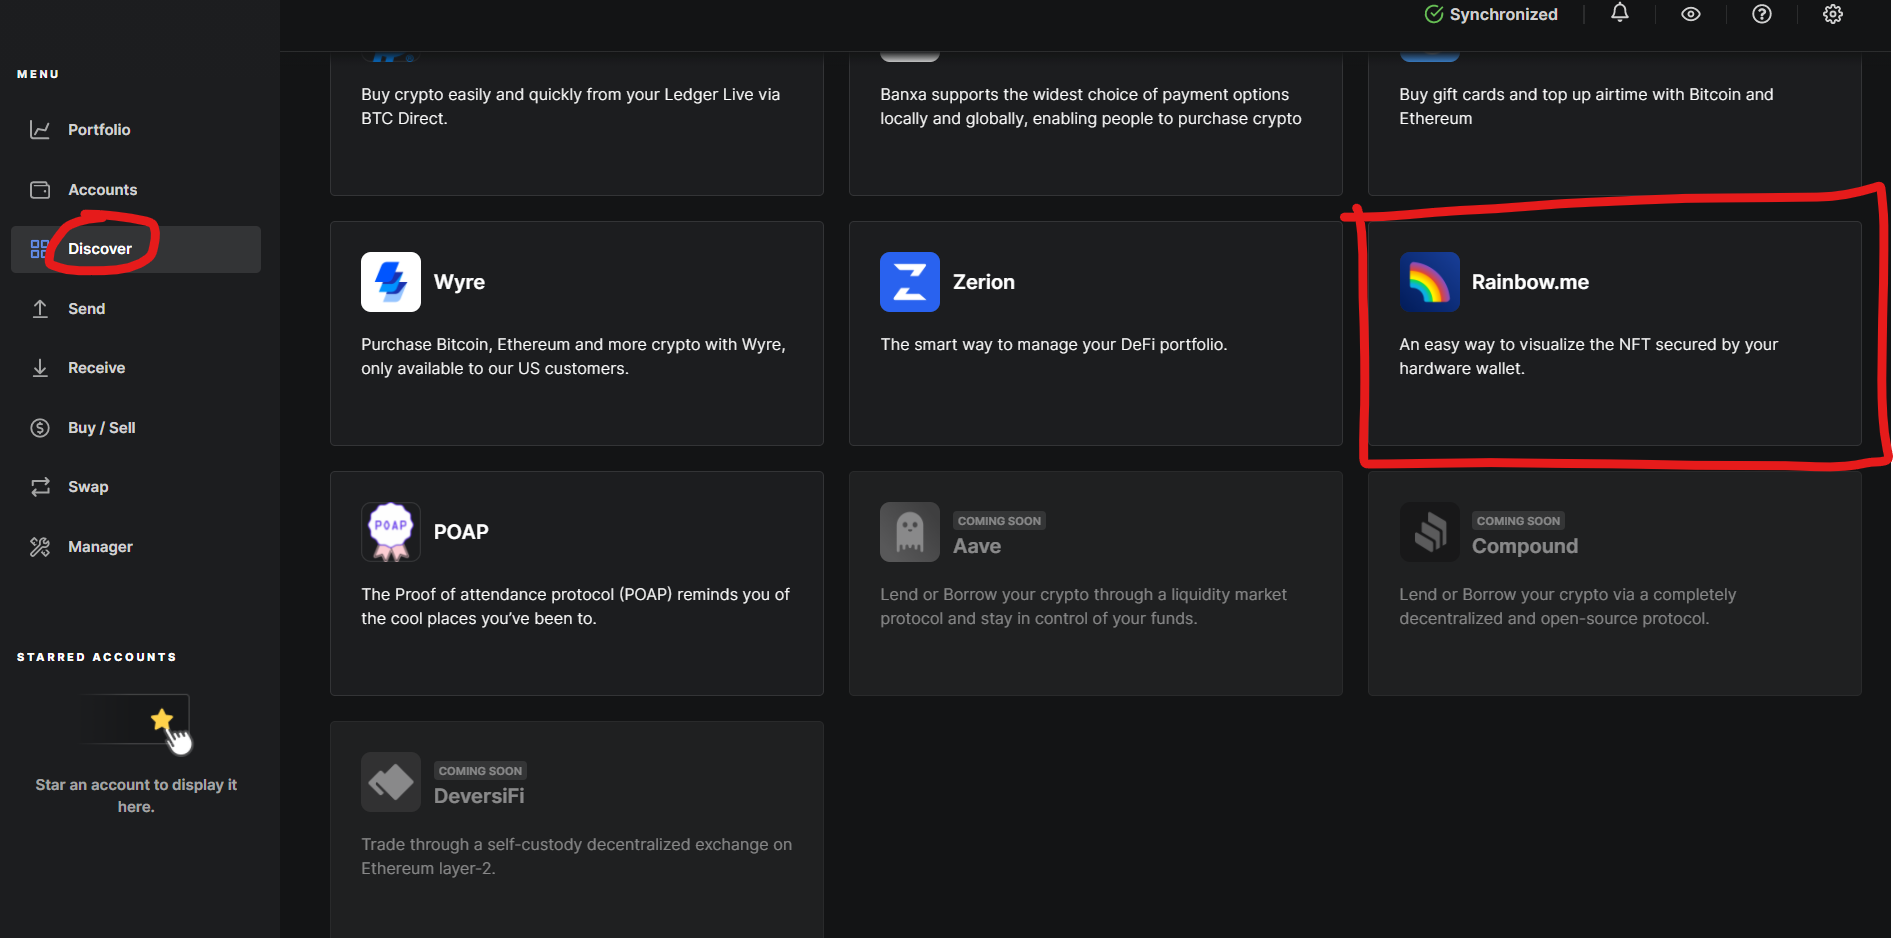
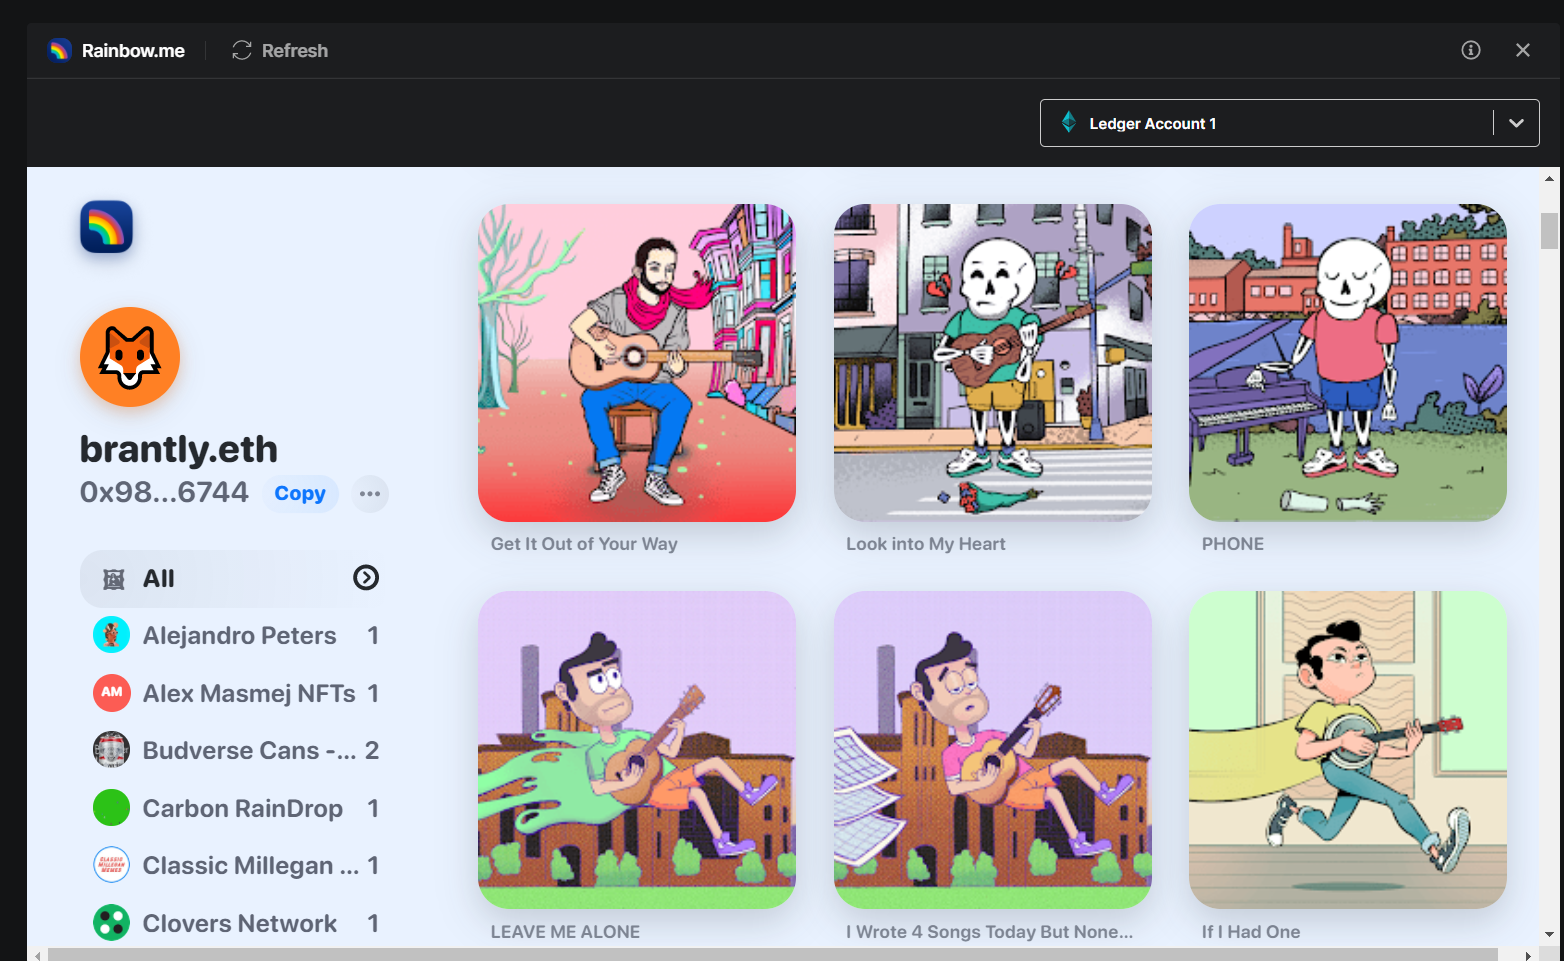
Using Ledger with Rainbow
Recently, Ledger integrated Rainbow into their Ledger Live suite, letting you display your NFTs directly within Ledger Live. Displaying these NFTs are easy!
Head over to the Ledger Live “Discover” dashboard and click Rainbow.me. If this is your first time, you’ll be prompted to consent to operate an external application. Click “Continue.”
In the top right corner, select the Ledger account you want to display. Now, your Ledger Live screen will populate with all the NFTs that address owns!
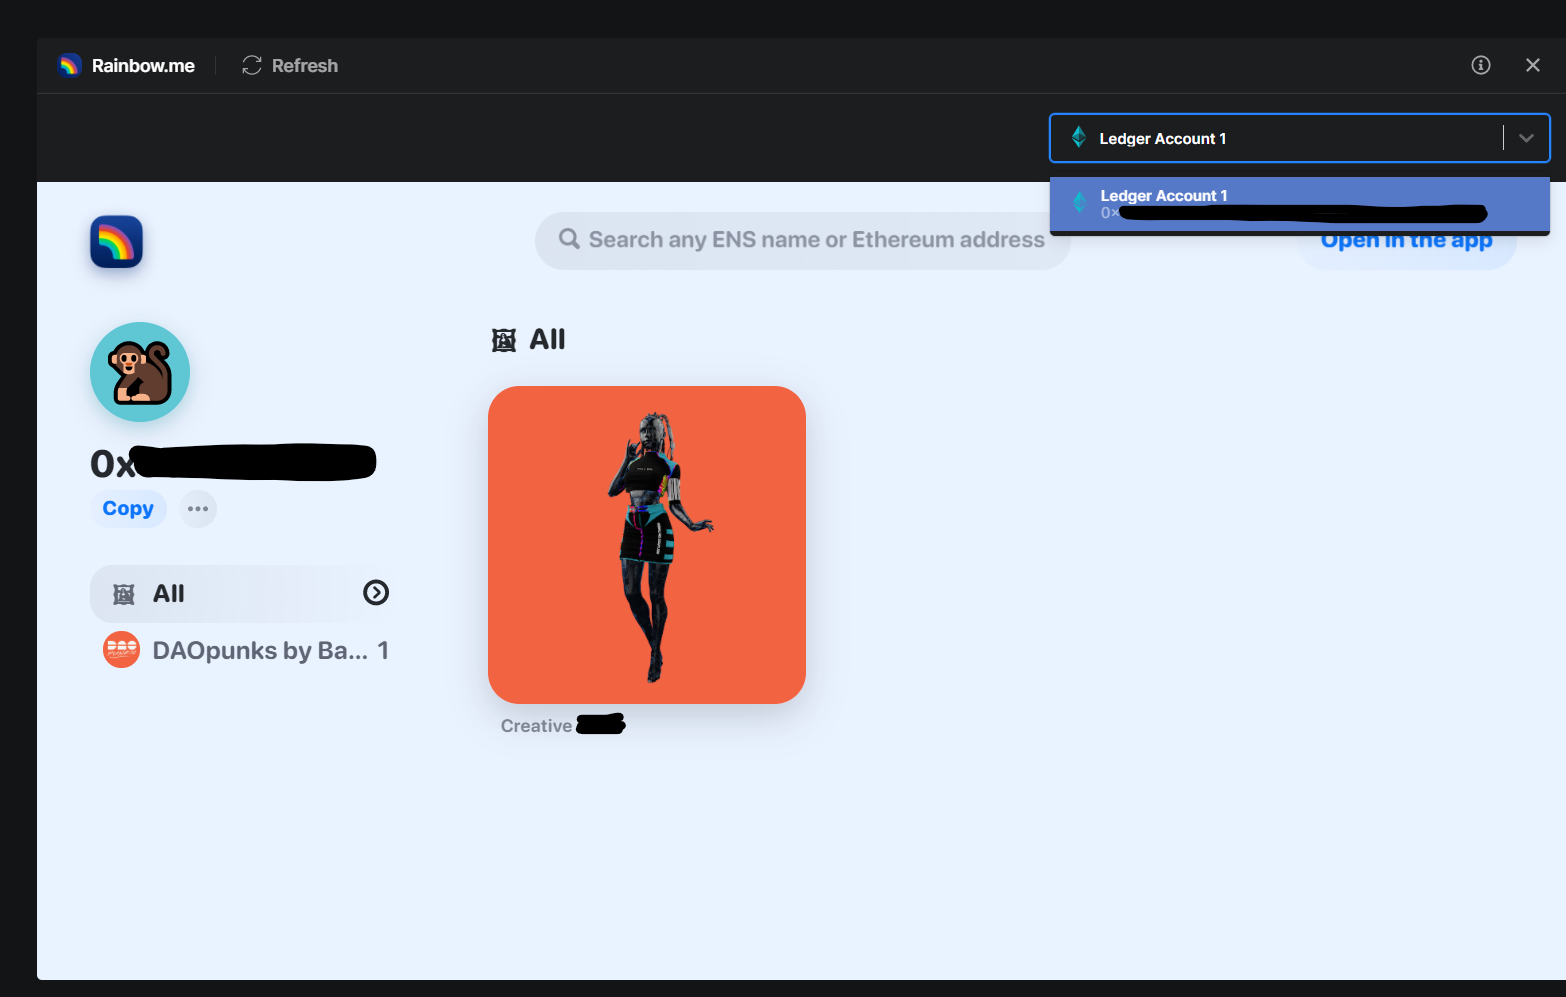
You can even search any other ENS or Etherem Address in the search bar! For example, here are some NFTs that brantly.eth owns - Brantly is a core contributor at ENS.


📚 Want to learn more about NFTs? Check out Ledger’s NFT Academy!
Conclusion
Best of luck on your DeFi & NFT journey with Ledger! Using a hardware wallet is an extra layer of security against hackers and scammers, but it doesn’t make you bullet-proof to every scam out there. Beware of strange links, double-check addresses, new tokens, and high-risk yield farming. Always do your research and be careful when moving your tokens between protocols. It can be scary navigating DeFi & NFTs in the dark, but Ledger is your extra layer of security to help you sleep soundly at night.