How To Set Up a Ledger Wallet
⬆️ Level up your crypto experience with the full Guide:
- How to set up your Ledger (👈 you are here)
- How to back up and store your Ledger
- How to add and swap assets with your Ledger
- How to stake ETH with your Ledger
- How to use DeFi & NFTs with your Ledger
- Troubleshooting & FAQ
Securing Your Crypto Starts Here
If the world of crypto is like the Wild West, as it has often been described, then scammers and hackers are the raiders and bandits while Ledger is the respected sheriff in town.
Ledger is a one-stop, ultra-secure, and easy way for crypto holders, builders, and enthusiasts to store and manage their crypto assets with peace of mind and without having to sleep with a shotgun under your pillow.
It’s not that kind of Wild West...
In this guide, we are going to walk you through how to set up your Ledger wallet to efficiently and securely buy, store, send, swap and grow your crypto and manage your NFTs in decentralized finance.
What is a Crypto Wallet?
A crypto wallet is a tool that gives you the ability to interact with a blockchain by creating the private and public keys that permit crypto transactions to happen. At the same time, they provide security for the private keys to your cryptocurrency funds.
There are two types of crypto wallets: hot wallets and cold wallets. Hot wallets store the keys to your crypto on an online exchange or application (such as Metamask or WalletConnect). Cold wallets store your keys offline, providing a security buffer.
They’re “cold” because they’re not “plugged-in” to the internet.
Entering the world of crypto is a daunting journey. Your top priority should be the maximum security of your assets. At its core, all crypto comes down to is efficient management of your keys.
This is the gold standard for the future of finance.
What is Ledger?
Ledger is a secure cold wallet that ensures your long-term cryptocurrency holdings are kept away from all vulnerabilities and under your own terms of storage. Combined with Ledger Live, you are able to efficiently (and effortlessly) manage your assets from your desktop or mobile.
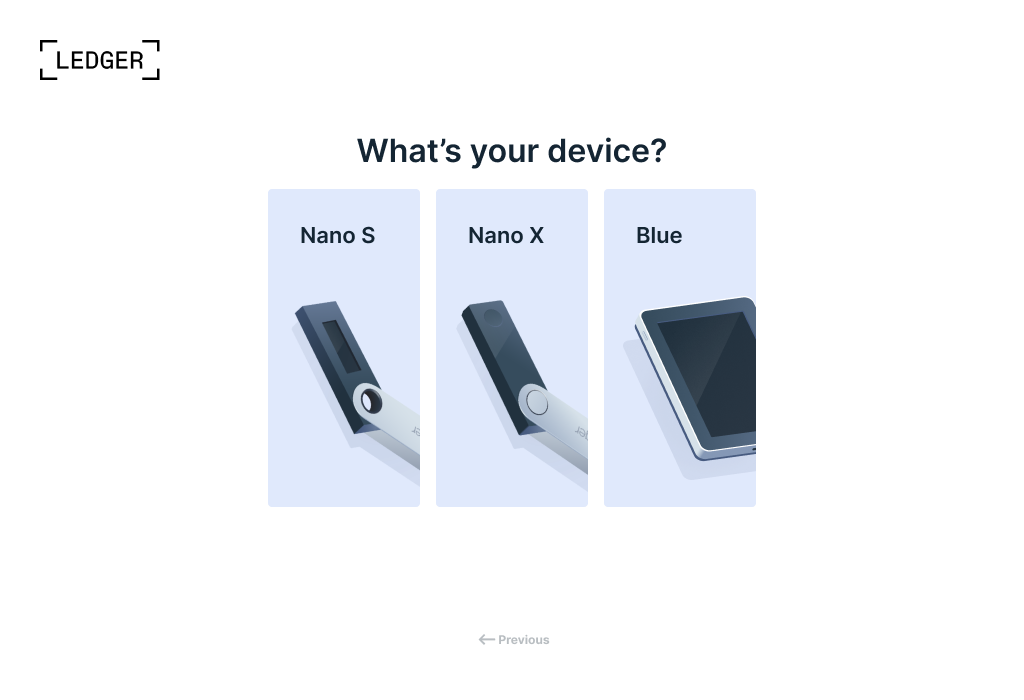
To start securing your stash, you are going to need to get your hands on a Ledger. If you don’t have one already, you can order a Ledger Nano X or Ledger Nano S from the official website here.
The Ledger Nano S is an easy tool for crypto beginners. The Ledger Nano X is a more comprehensive solution that extends beyond the needs of a newcomer, providing an efficient means of managing all your crypto securely. Both provide unmatched security in a sleek device that fits in the palm of your hand.
If you already have a Ledger in front of you, let’s get down to it.
🔒 Security considerations to note:
- Ensure the shrink wrapping around your Ledger was untouched when you received it. If your package looks tampered with, do not proceed with set-up and contact Ledger customer support immediately.
- When first powered on, the device should not display any preset PIN code. If any code appears on the first power on, contact ledger customer support immediately.
- Was there a list of pre-filled recovery words in the packaging? If so, contact Ledger customer support immediately and do not proceed with the installation.
You can contact Ledger Customer Support here.
Ledger Security Checklist
- Make sure you and your selected confidants are the only ones who have access to your secret 24-word recovery phrase (more on this in a moment).
- DO NOT store your recovery phrase on a computer, smartphone, or any other networked device. Keep your recovery phrase physically secure.
- DO NOT use a device with a preset PIN code or a pre-supplied 24-word recovery phrase.
- Ledger does not have a backup of your 24-word phrase. If you lose this, you can lose your assets.
Getting Started with your Ledger
Pre-Setup
1. Unbox your device and inspect the contents.
In your box, you should have the following contents:
- 1 hardware wallet
- 1 USB cable
- 1 getting started leaflet
- 3 recovery sheets
- 1 keychain strap
2. Download and install the Ledger Live application on your device
The next step is to download the Ledger Live application and install it on your computer or mobile device. Ledger Live downloads are available for all the following devices running at least the specified operating systems: iOS9 and above, Android 7 and above, Windows 8.1 (64 bit) and higher, macOS 10.10 and above, or Linux.
What is Ledger Live?
Ledger Live is the native software that allows a user to set up their device securely and manage their crypto assets.
Visit Ledger Live to download the Ledger Live application
The Ledger Live application allows you to:
- Setup your Ledger key
- Buy crypto
- Send and receive crypto
- Swap one crypto for another, and,
- Stake your crypto to make money passively from your existing assets
- Track and manage your entire crypto and DeFi portfolio
- Access many DeFi Apps like Zerion, 1inch, ParaSwap
- Display and manage your NFTs
3. After installing Ledger Live on your computer, run the application
Click or tap through the Get Started sequence. You will have to accept some terms and conditions that outline the privacy policy and state explicitly your responsibility for keeping your recovery phrase and key secure.
After agreeing to these, you will be prompted to select your Ledger Device.
Device Setup
4. After selecting your device, follow the prompts and proceed to Set up New Device
Since this is your first setup, select New Device.
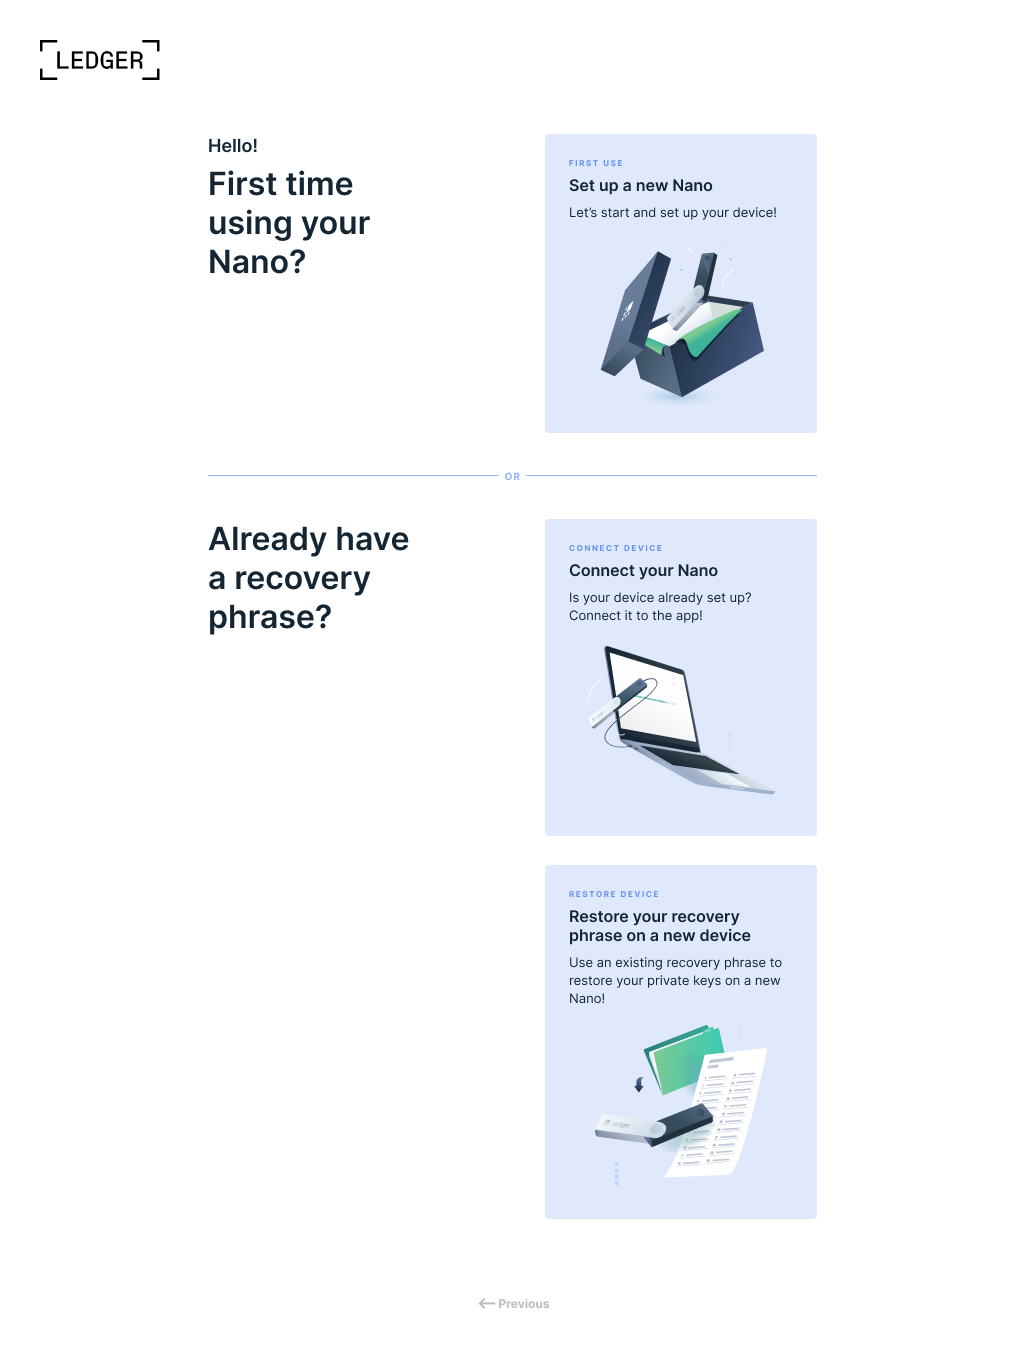
Following this selection, you will see informational slides that remind you that your private keys are stored on the device and you are the only one with access to that.
5. Initialize your device
At this stage, you will need a pen and paper handy.

The prompt on the screen will tell you to connect your Ledger device to the computer.
💡 Note: You can initialize your device by plugging it into a USB charger or non-networked computer as well.
With your Ledger powered on, press the button on the right to see the information on the device. Press the right & left buttons to scroll through the menu and lists.
Controls to note:
- Press the left and right buttons to browse through the menu
- Press both buttons to confirm an action
- Press and hold both buttons to access the settings
- Long press and hold both buttons to turn off the device
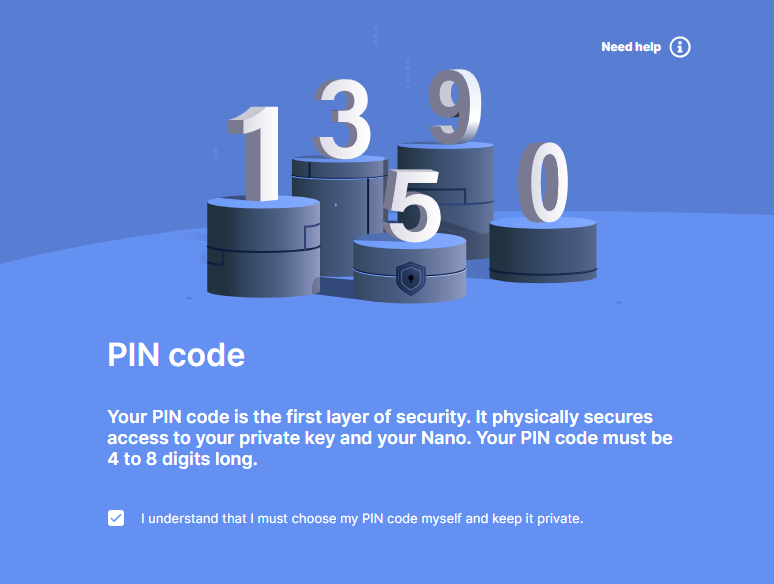
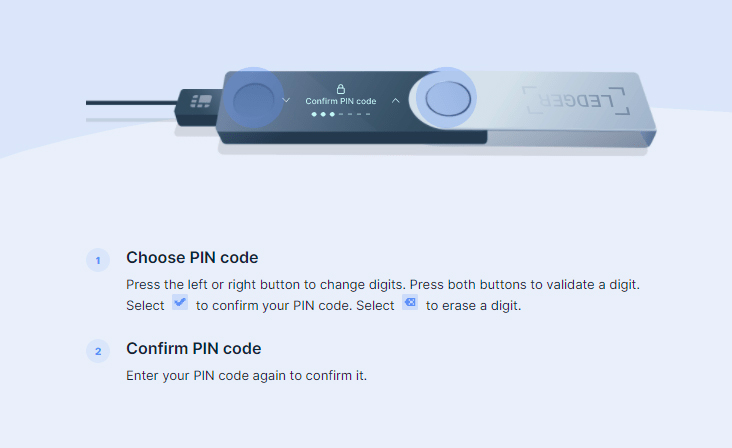
Setting up a pin
5. The screen on the Ledger will prompt you to start Ledger Live to get assistance
- Proceed to set up as a new device. Confirm this action by pressing both buttons at the same time.
- Use the buttons to set up a PIN code that is between four and eight digits. Confirm this action. Use the right button for ascending numbers and the left for descending numbers.
- When you reach four digits, you will see a tick - You can choose to end here or continue to fill out the rest of the digits.
- Write down your PIN and press both buttons to confirm.
Your Secret Recovery Phrase
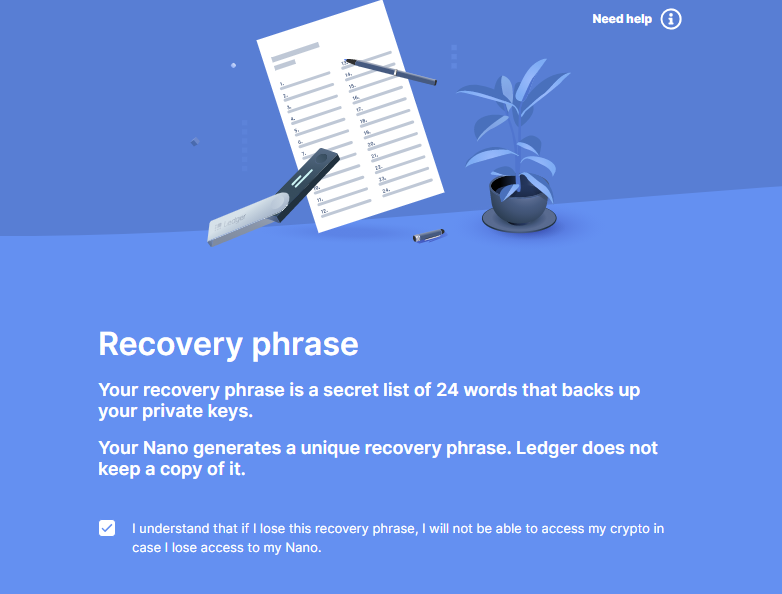
6. Generate and write down your secret recovery phrase
This is a list of 24 words that you need to write down in the correct order with the right spellings.
⚠️ IMPORTANT: Do this in private; make sure there is no one around you who is able to see what you are doing or writing down. Avoid public areas where there are routinely surveillance cameras and/or public WiFi areas such as coffee shops, shopping malls, or hotel lobbies.
🚨 REMEMBER: Keep your 24-word recovery phrase in a safe place away from others.

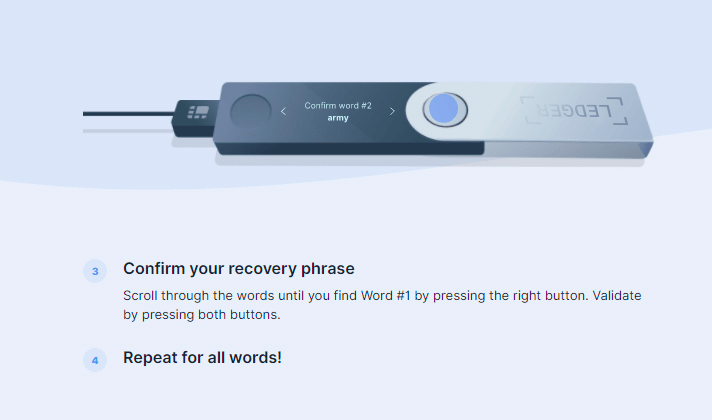
⚠️ IMPORTANT: Confirm your phrase by scrolling through the words and pressing both buttons on the right word/sequence.
7. Go back to the Ledger Live app and finish a simple quiz to move you on to the next stage of Ledger Live setup.
Verifying that your device is genuine

7. Connect and unlock your device
At this step, you will be prompted to connect and unlock your device (if it isn't connected already).
If your device is connected, you will be prompted to “Allow Ledger Manager” on the device.
8. Press both buttons to confirm
After this check, a genuine device notification will pop up, indicating that your device is now secure and ready to use with Ledger Live!
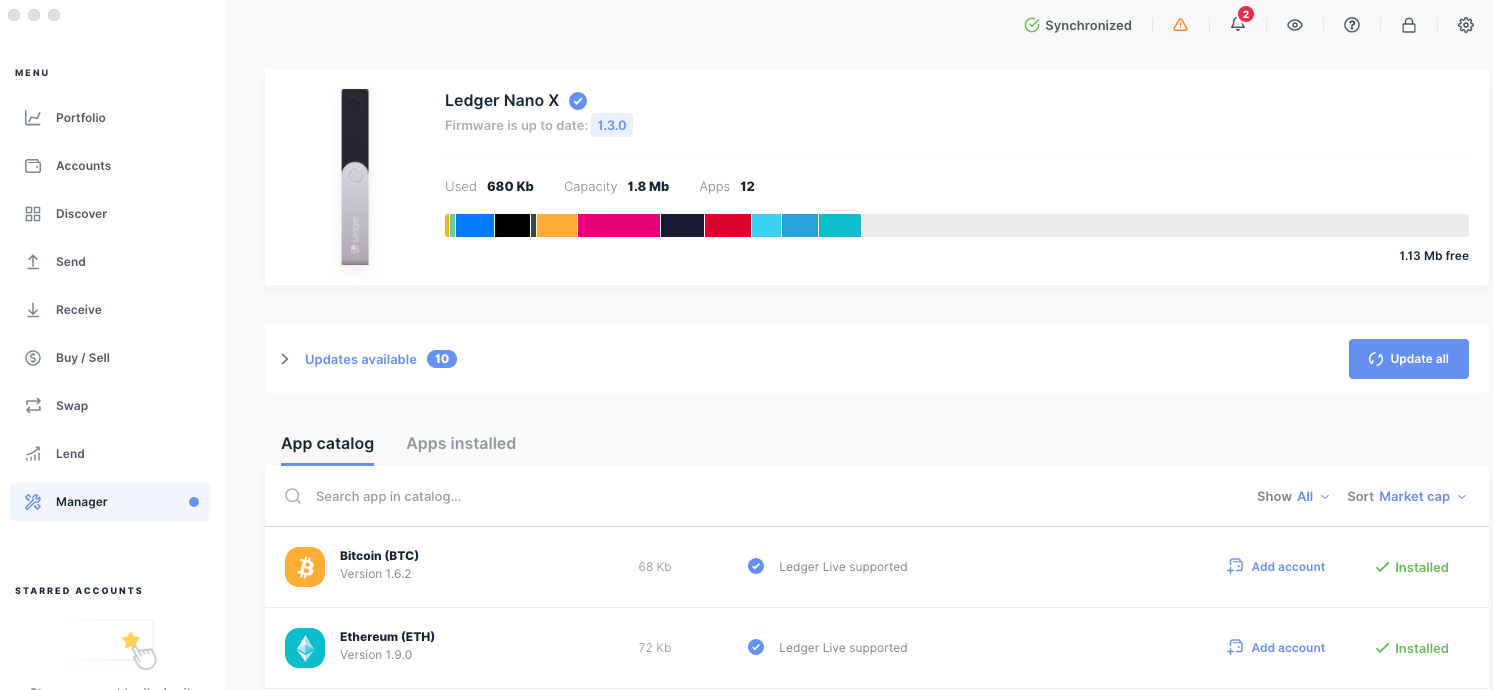
Post Setup: Installing Apps
After verification of your device, you will now have access to your Ledger Live Manager!
From this Dashboard, you can update your Firmware, install the various apps for your different cryptocurrencies and explore the world of Ledger! You can find the full list of supports apps and services on the Ledger website.
Conclusion
Now that you’ve taken the necessary steps to set up your Ledger wallet efficiently, you can securely navigate your financial future.
As mentioned, Ledger offers additional opportunities beyond storage, which include trades, swaps, and staking your assets for greater yield. Just recently, Ledger integrated with Bitrefill, which permits purchasing goods and services at retailers. Bittrex allows you to convert your crypto into vouchers and gift cards, which are accepted at locations like Airbnb, Google Play, Starbucks, Adidas, Netflix and more!
Another product that’s quickly coming to market from Ledger is their Crypto Life (CL) Card.
Ledger’s CL debit card lets you make purchases using your crypto by converting it to fiat at the time of purchase, open a slide of stablecoin credit, and receive a portion of your paycheck in crypto, all managed with Ledger Live!
As the line between crypto and physical devices grows smaller, the need to manage your crypto with a physical card increases. You can join the waitlist here.
Ledger provides a time-tested instrument to secure your financial prosperity. Remember that only you hold the keys to these assets. Please give this great responsibility the time and attention it deserves.